How to Conduct an Effective Safety Drill: A Step-by-Step Guide
Safety drills are your first line of defense against chaos during emergencies. Think of them as practice sessions for your team to stay calm, act quickly, and follow the plan when it matters most. But here’s the catch—conducting a drill isn’t just about gathering people and running through the motions. It’s about making sure everyone knows their roles, identifying gaps, and improving readiness.
Let’s dive into the essentials to make your safety drills impactful.
Why Safety Drills Matter

Safety drills aren’t just about compliance—they’re about saving lives and minimizing damage. Here’s why they’re invaluable:
- Build Confidence: Employees know what to do, reducing panic during emergencies.
- Test Your Emergency Plan: Drills expose weaknesses that might otherwise go unnoticed.
- Improve Team Coordination: They foster collaboration, ensuring everyone works together effectively.
- Compliance Assurance: Regular drills help you meet legal and industry safety requirements.
How to Conduct an Effective Safety Drill
Step 1: Define Your Objectives
What’s the purpose of this drill? Whether it’s testing evacuation times, preparing for specific scenarios, or assessing communication channels, having clear goals ensures the drill is focused and meaningful.
Step 2: Plan the Drill in Detail
Map out every step. Decide on the scenario, assign roles (like team leads and observers), and outline the timeline. Include contingencies for unexpected issues. A well-thought-out plan is the backbone of an effective drill.
Step 3: Communicate Clearly
Tell your team about the drill. Share the date, time, and objectives. Set expectations, but keep certain elements realistic and unscripted to test their readiness under pressure.
Step 4: Simulate Realistic Scenarios
The more authentic, the better. For instance, in a fire drill, use actual alarms and practice evacuation. If it’s a chemical spill, simulate the hazard using safe props. Realism boosts learning and retention.
Step 5: Observe and Record
Use observers to track how the drill unfolds. Did employees follow the plan? Were there delays or confusion? Document everything—it’s valuable data for improving your safety protocols.
Step 6: Debrief and Discuss
After the drill, hold a debriefing session. Talk about what went well and what didn’t. Encourage honest feedback. This open dialogue helps identify gaps and reinforces a culture of safety.
Step 7: Update Your Emergency Plan
Adjust your emergency procedures based on what you learned. Drills aren’t a one-time event—they’re part of an evolving safety strategy.
Step 8: Practice Regularly
Repetition is key. Regular drills ensure employees stay sharp and ready for any situation.
Common Pitfalls to Avoid

- Lack of Realism: If the scenario feels fake, employees may not take it seriously.
- Poor Communication: Failing to inform or guide participants can lead to confusion.
- Skipping the Debrief: Without analyzing the drill, you miss the chance to improve.
- Infrequent Drills: Rare drills lead to complacency and forgotten procedures.
Pro Tips for Success
- Mix It Up: Rotate through different types of drills (fire, earthquake, medical emergencies) to prepare for various scenarios.
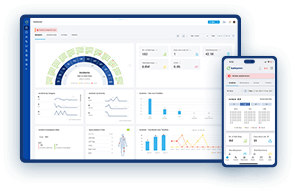
- Use Technology: Safety software can help you schedule, document, and analyze drills more effectively.
- Involve Everyone: Include all employees, even contractors or part-timers, to ensure no one is left out.
Key Takeaway
Safety drills are more than a checkbox—they’re a lifeline. They prepare your team to act confidently, expose weaknesses in your emergency plans, and build a culture of safety. By planning carefully, simulating real scenarios, and learning from each drill, you’ll make your workplace safer and more resilient.
Ready to put your plan into action?
This article was generated with the assistance of AI and reviewed by Ramesh Nair for accuracy and quality.

Ramesh Nair is the Founder and Principal Partner of Niyati Technologies, the company behind Safetymint.
He’s a dedicated advocate for workplace safety. Ramesh firmly believes that every individual deserves to return home safely after a day’s work. Safetymint, the innovative safety management software, emerged from this conviction. It’s a platform designed to streamline safety management, empower safety professionals, and enhance safety in workplaces.
Through his blog, Ramesh shares insights, best practices, and innovative solutions for workplace safety. Visit his social media profiles to follow him for regular updates.


